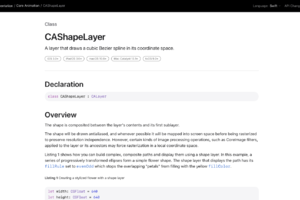
Objective-C 是一门面向对象的编程语言,广泛应用于 iOS 和 macOS 应用程序的开发。除了常规的编程功能之外,Objective-C 还提供了绘制图形的 API,可以用来绘制线条、矩形、文字等基本图形。在这篇文章中,我们将讨论两种绘图方式:使用 CAShapeLayer 绘制和使用 CGContextRef 绘制。

本文将介绍使用Objective-C绘制基本图形的两种方式:使用CAShapeLayer和CGContextRef,分别讨论它们的优缺点、性能等方面。通过示例代码,展示了如何使用这两种方式分别绘制矩形、圆形等基本图形,并指出了适用场景。
两种绘图方式
使用 CAShapeLayer 绘制
CAShapeLayer 是 Core Animation 框架提供的一种绘图方式,可以用来绘制各种形状。它的优点是可以通过设置路径来实现复杂的图形效果,同时还支持填充和描边等样式设置。以下是使用 CAShapeLayer 绘制一个矩形的示例代码:
CAShapeLayer *rectangleLayer = [CAShapeLayer layer];
CGRect rect = CGRectMake(50, 50, 100, 100);
UIBezierPath *path = [UIBezierPath bezierPathWithRect:rect];
rectangleLayer.path = path.CGPath;
rectangleLayer.fillColor = [UIColor clearColor].CGColor;
rectangleLayer.strokeColor = [UIColor redColor].CGColor;
[self.view.layer addSublayer:rectangleLayer];
使用 CGContextRef 绘制
CGContextRef 是 Core Graphics 框架提供的一种绘图方式,可以用来绘制各种形状和文字。它的优点是可以直接在 UIView 上绘制图形,适合于一些简单的绘图需求。以下是使用 CGContextRef 绘制一个矩形的示例代码:
CGRect rect = CGRectMake(50, 50, 100, 100);
CGContextRef context = UIGraphicsGetCurrentContext();
CGContextAddRect(context, rect);
CGContextSetFillColorWithColor(context, [UIColor clearColor].CGColor);
CGContextSetStrokeColorWithColor(context, [UIColor redColor].CGColor);
CGContextDrawPath(context, kCGPathFillStroke);
性能、优缺点对比
使用 CAShapeLayer 绘制图形的优点是可以通过设置路径来实现复杂的图形效果,同时还支持填充和描边等样式设置。缺点是相对于 CGContextRef 绘制,CAShapeLayer 的性能会有所下降,适合于需要频繁更新的动态图形。而使用 CGContextRef 绘制图形的优点是绘制速度较快,适合于需要快速绘制一些简单的图形。缺点是不支持复杂的路径设置,同时也无法方便地实现填充和描边等效果。
简单用法
以下是使用 CAShapeLayer 绘制一个圆形和使用 CGContextRef 绘制一个矩形的示例代码:
// 绘制圆形
CAShapeLayer *circleLayer = [CAShapeLayer layer];
CGPoint center = CGPointMake(100, 100);
CGFloat radius = 50;
UIBezierPath *path = [UIBezierPath bezierPathWithArcCenter:center radius:radius startAngle:0 endAngle:M_PI*2 clockwise:YES];
circleLayer.path = path.CGPath;
circleLayer.fillColor = [UIColor clearColor].CGColor;
circleLayer.strokeColor = [UIColor blueColor].CGColor;
circleLayer.lineWidth = 2.0;
[self.view.layer addSublayer:circleLayer];

// 绘制矩形
CGRect rect = CGRectMake(200, 50, 100, 100);
CGContextRef context = UIGraphicsGetCurrentContext();
CGContextAddRect(context, rect);
CGContextSetFillColorWithColor(context, [UIColor clearColor].CGColor);
CGContextSetStrokeColorWithColor(context, [UIColor greenColor].CGColor);
CGContextSetLineWidth(context, 2.0);
CGContextDrawPath(context, kCGPathFillStroke);
通过上述示例代码可以看出,使用 CAShapeLayer 绘制一个圆形的代码相对较简单,同时可以方便地设置颜色和线宽等效果;而使用 CGContextRef 绘制一个矩形的代码虽然稍微复杂一些,但是绘制速度较快,适合于需要快速绘制简单图形的场景。
综上所述,根据实际需求来选择合适的绘图方式是很重要的,CAShapeLayer 和 CGContextRef 各有其优缺点,需要根据实际场景来选择使用。
性能、优缺点对比
在性能方面,CAShapeLayer 通常比 CGContextRef 绘制更快,这是因为 CAShapeLayer 采用了硬件加速的方式绘制图形,而 CGContextRef 是使用 CPU 绘制的。另外,CAShapeLayer 还有一个重要的优点是可以自动地处理图形变换,这对于需要对图形进行旋转、缩放等操作的场景非常有用。
但是,CAShapeLayer 也存在一些缺点。由于 CAShapeLayer 绘制图形的方式是基于矢量的,因此对于一些比较复杂的图形,CAShapeLayer 的绘制性能可能会受到影响。此外,由于 CAShapeLayer 绘制图形时需要使用多个图层叠加,因此在绘制大量图形时,可能会导致图层数量过多,从而占用过多的内存资源。
相比之下,CGContextRef 绘制图形的方式是基于像素的,因此对于一些比较简单的图形,CGContextRef 的绘制速度通常会比 CAShapeLayer 更快。此外,由于 CGContextRef 是直接操作像素的,因此可以更加精确地控制图形的绘制效果。
但是,CGContextRef 也存在一些缺点。由于 CGContextRef 不支持图形变换,因此在对图形进行旋转、缩放等操作时,需要手动计算变换矩阵,这对于一些不太熟悉数学的开发者来说可能会比较困难。此外,由于 CGContextRef 是基于像素的绘制方式,因此在绘制高分辨率图形时,可能会出现锯齿、失真等问题。
综上所述,CAShapeLayer 和 CGContextRef 各有其优缺点,需要根据实际需求来选择使用。
案例例子
下面我们来看一个综合示例,使用 CAShapeLayer 和 CGContextRef 分别绘制一个复杂的图形。
首先是使用 CAShapeLayer 绘制图形的示例代码:
// 创建路径
UIBezierPath *path = [UIBezierPath bezierPath];
[path moveToPoint:CGPointMake(50, 50)];
[path addLineToPoint:CGPointMake(150, 150)];
[path addLineToPoint:CGPointMake(50, 150)];
[path closePath];

// 创建 CAShapeLayer
CAShapeLayer *shapeLayer = [CAShapeLayer layer];
shapeLayer.path = path.CGPath;
shapeLayer.fillColor = [UIColor redColor].CGColor;
shapeLayer.strokeColor = [UIColor greenColor].CGColor;
shapeLayer.lineWidth = 2.0;

// 添加到视图中
[self.view.layer addSublayer:shapeLayer];
然后是使用 CGContextRef 绘制同样的图形的示例代码:
// 获取绘图上下文
CGContextRef context = UIGraphicsGetCurrentContext();

// 创建路径
CGContextMoveToPoint(context, 50, 50);
CGContextAddLineToPoint(context, 150, 150);
CGContextAddLineToPoint(context, 50, 150);
CGContextClosePath(context);

// 设置填充颜色和描边颜色
CGContextSetFillColorWithColor(context, [UIColor redColor].CGColor);
CGContextSetStrokeColorWithColor(context, [UIColor greenColor].CGColor);

// 绘制路径
CGContextSetLineWidth(context, 2.0);
CGContextDrawPath(context, kCGPathFillStroke);
这两个示例代码分别使用了 CAShapeLayer 和 CGContextRef 来绘制一个由三条线段组成的封闭图形,其中 CAShapeLayer 的代码更加简洁易懂,而 CGContextRef 的代码则更加精细灵活。
无论是使用 CAShapeLayer 还是 CGContextRef 来绘制图形,都需要根据实际需求来选择合适的方式,以达到最优的绘制效果和性能。
![图片[1]-诚哥博客微信公众号同步更新啦,文章转发工具助力推广-诚哥博客](http://oss.chengzz.com/typora_img/202303301641956.jpeg?imageView2/0/q/75)


暂无评论内容